
This is my first attempt at Northern Brewer’s Dead Ringer IPA all-grain kit done brew-in-a-bag. It’s a clone of the Bell’s Brewery Two Hearted Ale.
Up to this point, I had always done my brewing on a 17,0000 BTU stove top burner, but I decided to try using a side burner on my grill instead. This burner was supposedly rated higher, 24,0000 BTU, but this turns out to be a longer brew day then I expected. That burner was not the best choice. I go though the basic process of brewing this beer with the Brew-in-a-Bag method. We start with plenty of daylight and end in the dark.
Watch me at each step, including preparation, brewing, fermentation, racking to a secondary, dry hopping, racking to a keg, and tasting.
Approximate times in the video are noted for reference.
Video Summary
Setting: Michigan Start in the day & end by night
Beer: Northern Brewer Dead Ringer IPA
First time I’ll be brewing outside because I have 12lbs of grain and need more room then my kitchen provides. I had to reinforce my grill top with steel to make sure to distribute the weight properly.
Preparation
Step 1: Set water level marks to measure how much water is in the kettle. There are many places to calculate this online. I’m using stainless steel hose claps measured to the top. My three clamps represent the mash level, pre-boil, and post boil.
Step 2: Begin filling pot up with water.
Brew
1:41
- Insert stainless-steel strainer into kettle
- Add heat shield – I used a piece of aluminum step flashing
- Bring strike temperature up to 158 to accommodate for grain temperature; recipe calls for it to be at 152 degrees
- Line grain bag in pot and clip with binder clips
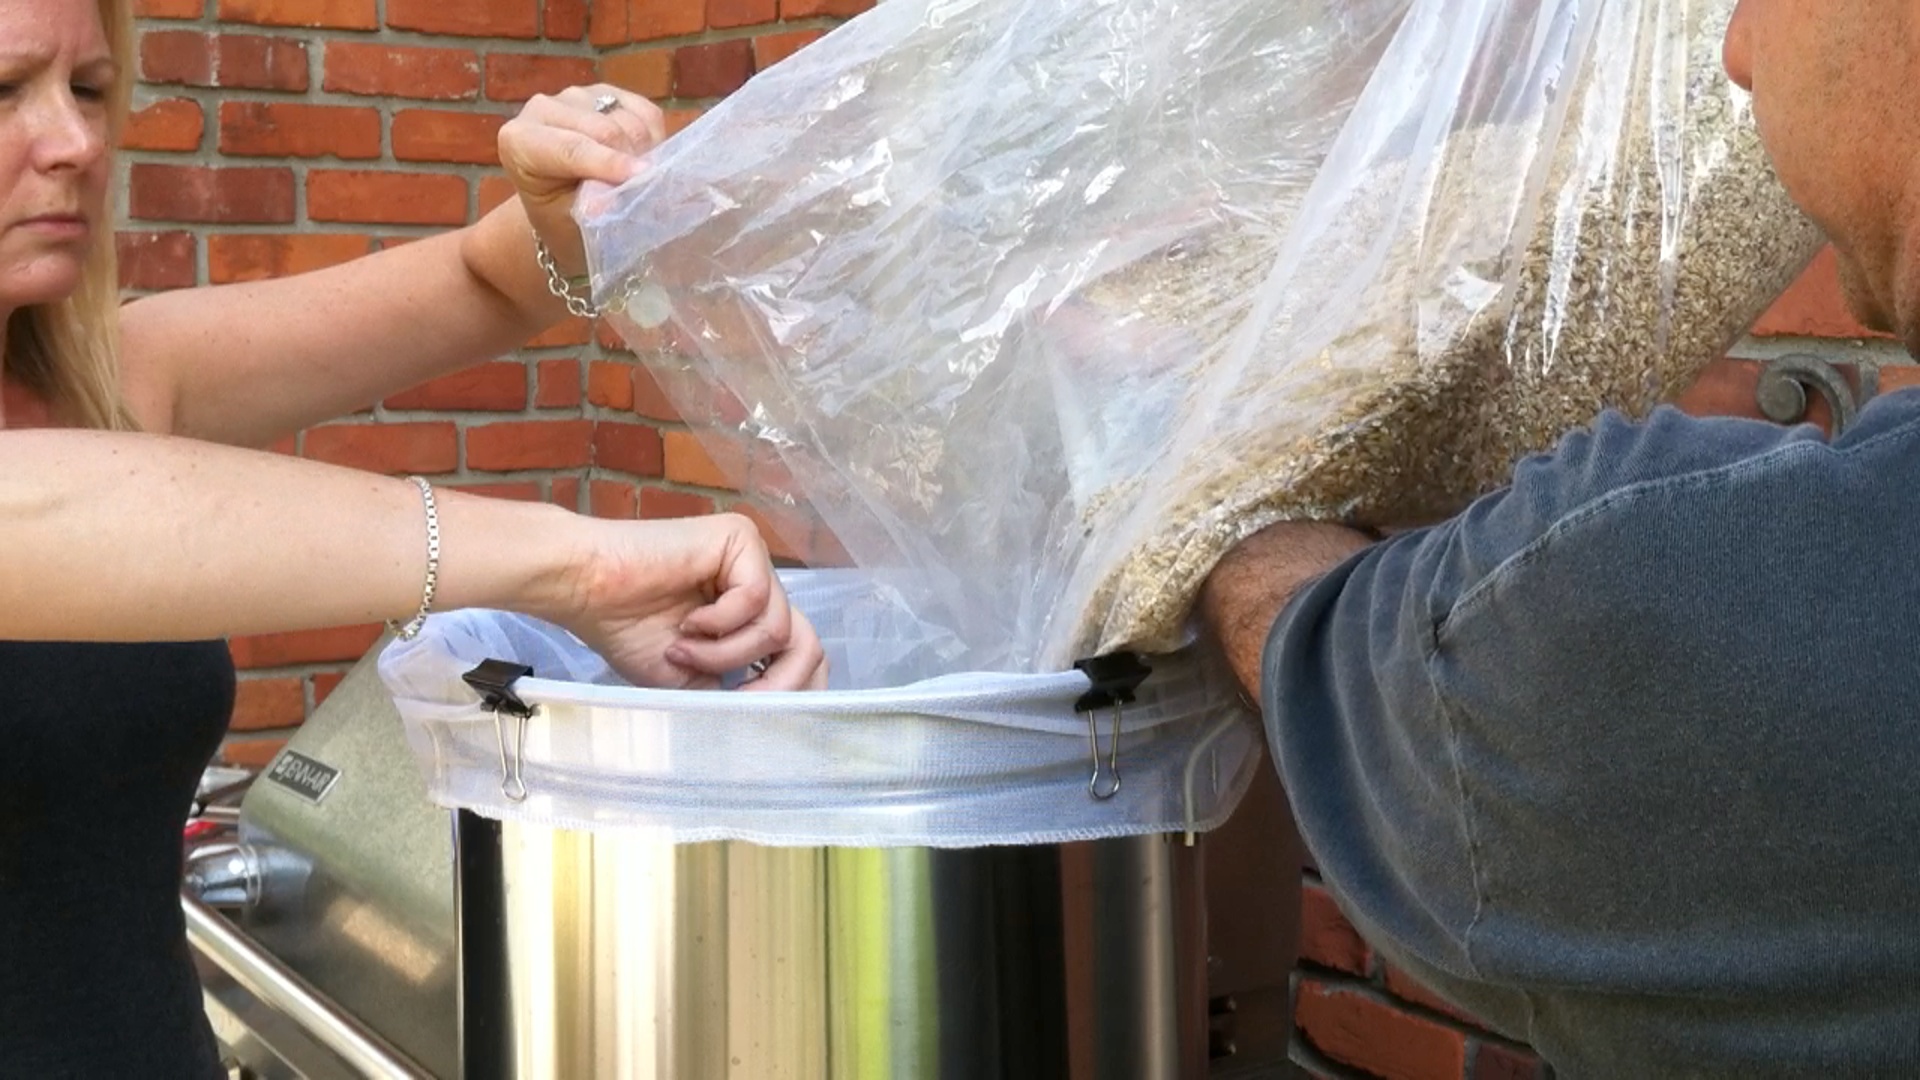
2:20 I add 12lbs of grains to the pot and stir.
2:51 Mash out is complete and I will now pull the grain bag out, squeezing as I go, being careful because It’s heavy. I’m going to pull it out then let it sit to strain for a bit. I will take my pre-boil gravity reading, then fire the pot back up to boiling and add the remaining liquid from the grains.
4:25 Time for my hop additions, I do two, and then add the Whirlfloc tablet. Then add the immersion chiller and my last hop addition.
Tip: Do a boil test on a new burner before your brew day. I’m unhappy with my burner – it is taking a very long time to get up to boiling temperature, prolonging my brew day.
6:16 I am going to rehydrate my yeast. I boiled 100mL of water and am cooling it down to the safe range of between 59-71.6 degrees.
7:13 It’s time to transfer to the carboy.
Fermentation

7:40 After the transfer I added a blow off tube and will cover it up with some blankets to block the light.
15 hours later and there is good fermentation started.
24 hours later and there is a lot of active fermentation.
2.5 days later and I put the fermentation lock on, everything looks good.
Racking to Secondary
8:45 It’s time to rack to the secondary with my auto siphon. I first tilted the carboy using a box, but in the future I plan to buy and use rubber door stoppers from the hardware store.
9:25 Originally I did not measure the levels in my carboy, so I did not know if I had too much. I had thought my original water calculation may have been off, so I added some water to the primary before I pitched. I obviously did not need to do that, my calculation was more accurate than I thought.
Dry Hopping
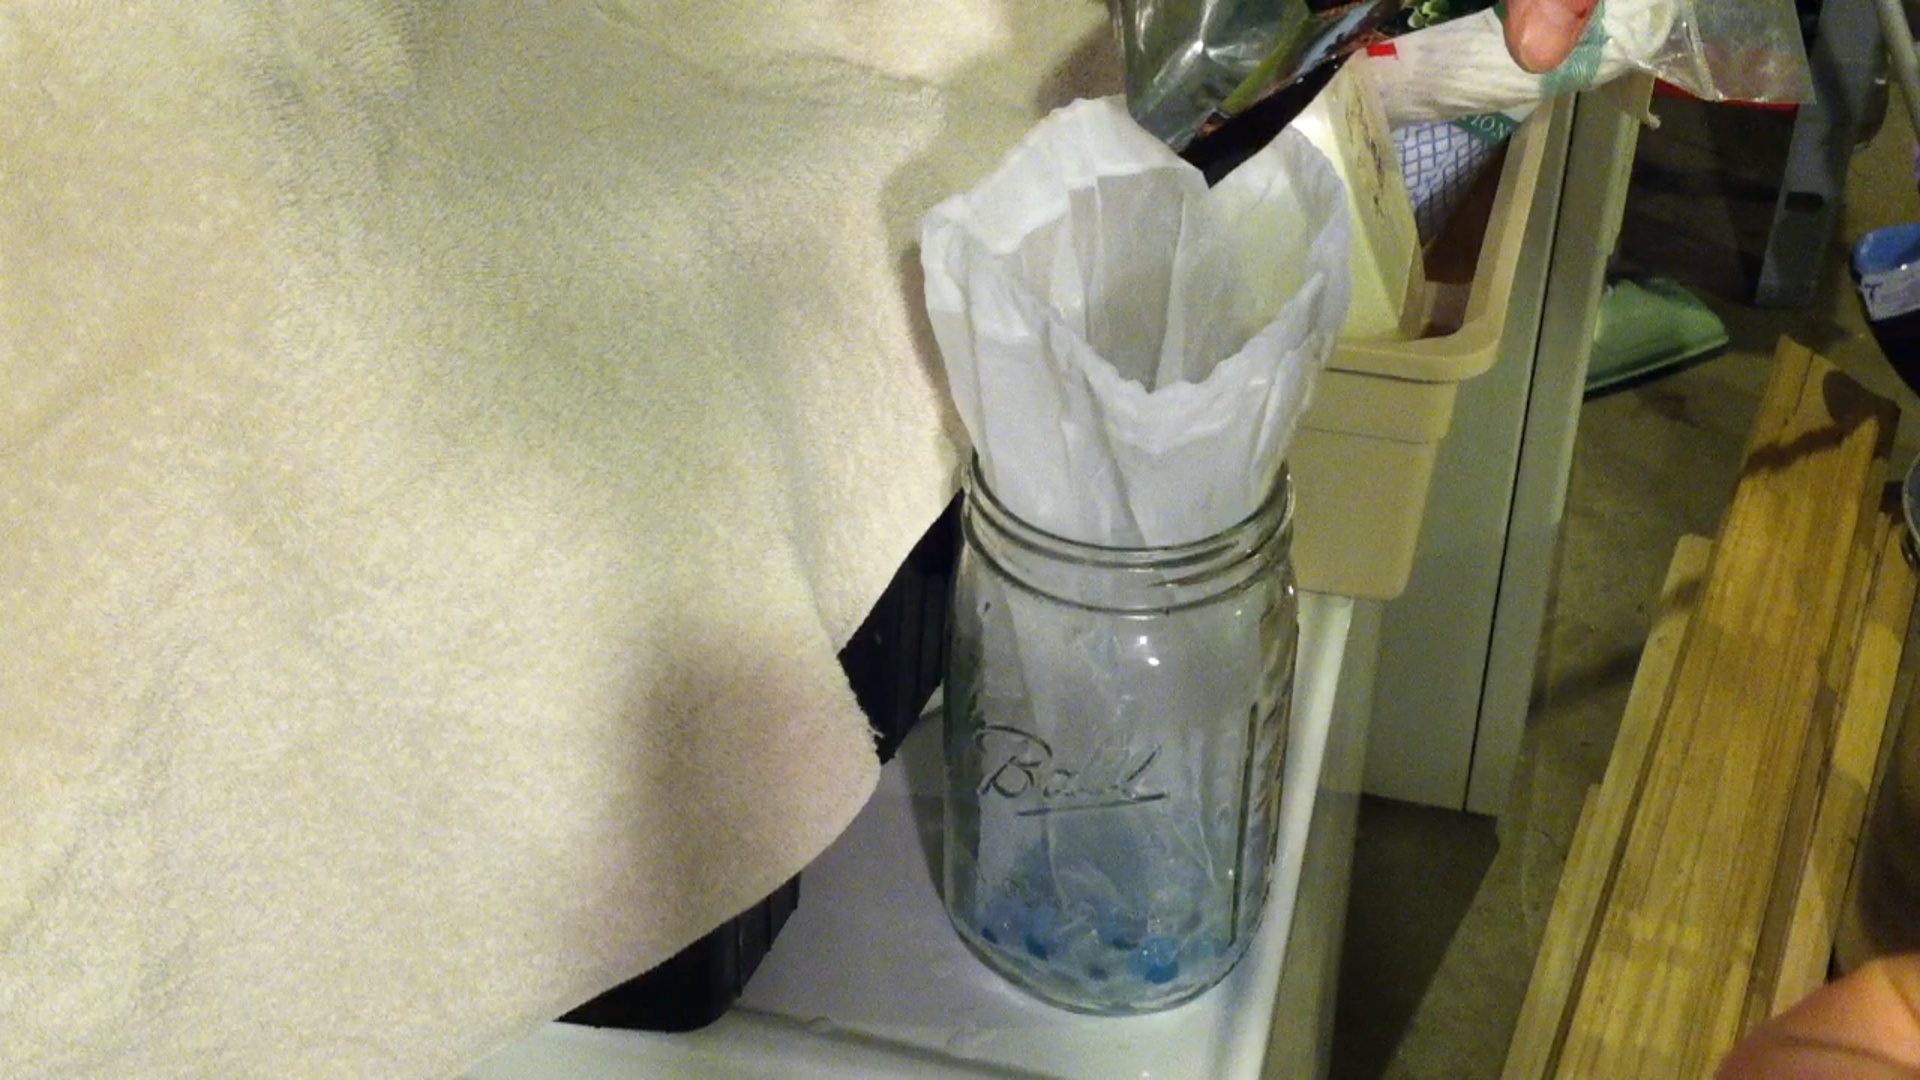
10:11 In order to dry hop my Dead Ringer IPA I first filled about a quarter of a mason jar with marbles and a hop bag, and then sanitized them. I then put the marbles in the hop bag and add the hops inside. After reading up a bit I decided to add an extra quarter ounce of hops to the bag as well. The marbles are there to help suspend the bag so it’s not sitting at the bottom or floating at the top.
I added this to my carboy and am not getting a good seal, even when changing the stopper. I have concluded it’s because the string on the bag is too thick. Fishing line would be an ideal solution, however I do not have any so I will be using some sewing thread. There is a risk that the string will not hold the bag and it will break. I found this tip at Brewers Friend website. Changing the string has now produced a great seal with the fermentation lock.
13:09 Two weeks after dry hopping there was a lot of bubbling in the airlock, hopefully that is not a secondary fermentation. I was away for a few days and when I got back realized some of the beer did back up into my airlock. So I’m going to clean the airlock and refill it. Everything now seems to be settled back. It’s supposed to sit in the secondary for 2-4 weeks, and it’s only been 2 weeks, so it has plenty of time to sit. So far the hops smell awesome.
14:10 I am taking another gravity reading then preparing to rack to the keg. I started this brew on July 28th and I’m finally getting around to kegging it on September 19th. It’s been in the secondary with the dry hops longer than I wanted it to be.
Racking to the Keg

14:27 I sanitized a hop bag and I’m putting it on the bottom of my auto siphon, hoping to capture some of the hops. I’m going to leave the other bag inside my carboy as I transfer because it will be too difficult to try and remove it with the marbles.
My flow is very stop and start and bubbles are forming, I think it’s because the hop bag keeps getting jammed in there. So far the hop bag is creating a lot of trouble for me; it’s going to take some maneuvering on my part to make it work. The only way to get a solid flow seems to be slowly rocking the siphon back and forth, which I don’t want to do. It seems my quest for clear beer comes with too many risks.
16:44 I eventually removed the hop bag, it’s what was causing my trouble. With the amount of aeration that was happening, it was not worth it. Hopefully the hops will settle out in the keg. We’ll have to see.
17:44 Now I’m going to clear my head space, I set my tank to 15-20+lbs. I’m going to purge the head space on the kegs about five times then cold crash for a couple of days before force carbing.
Tasting
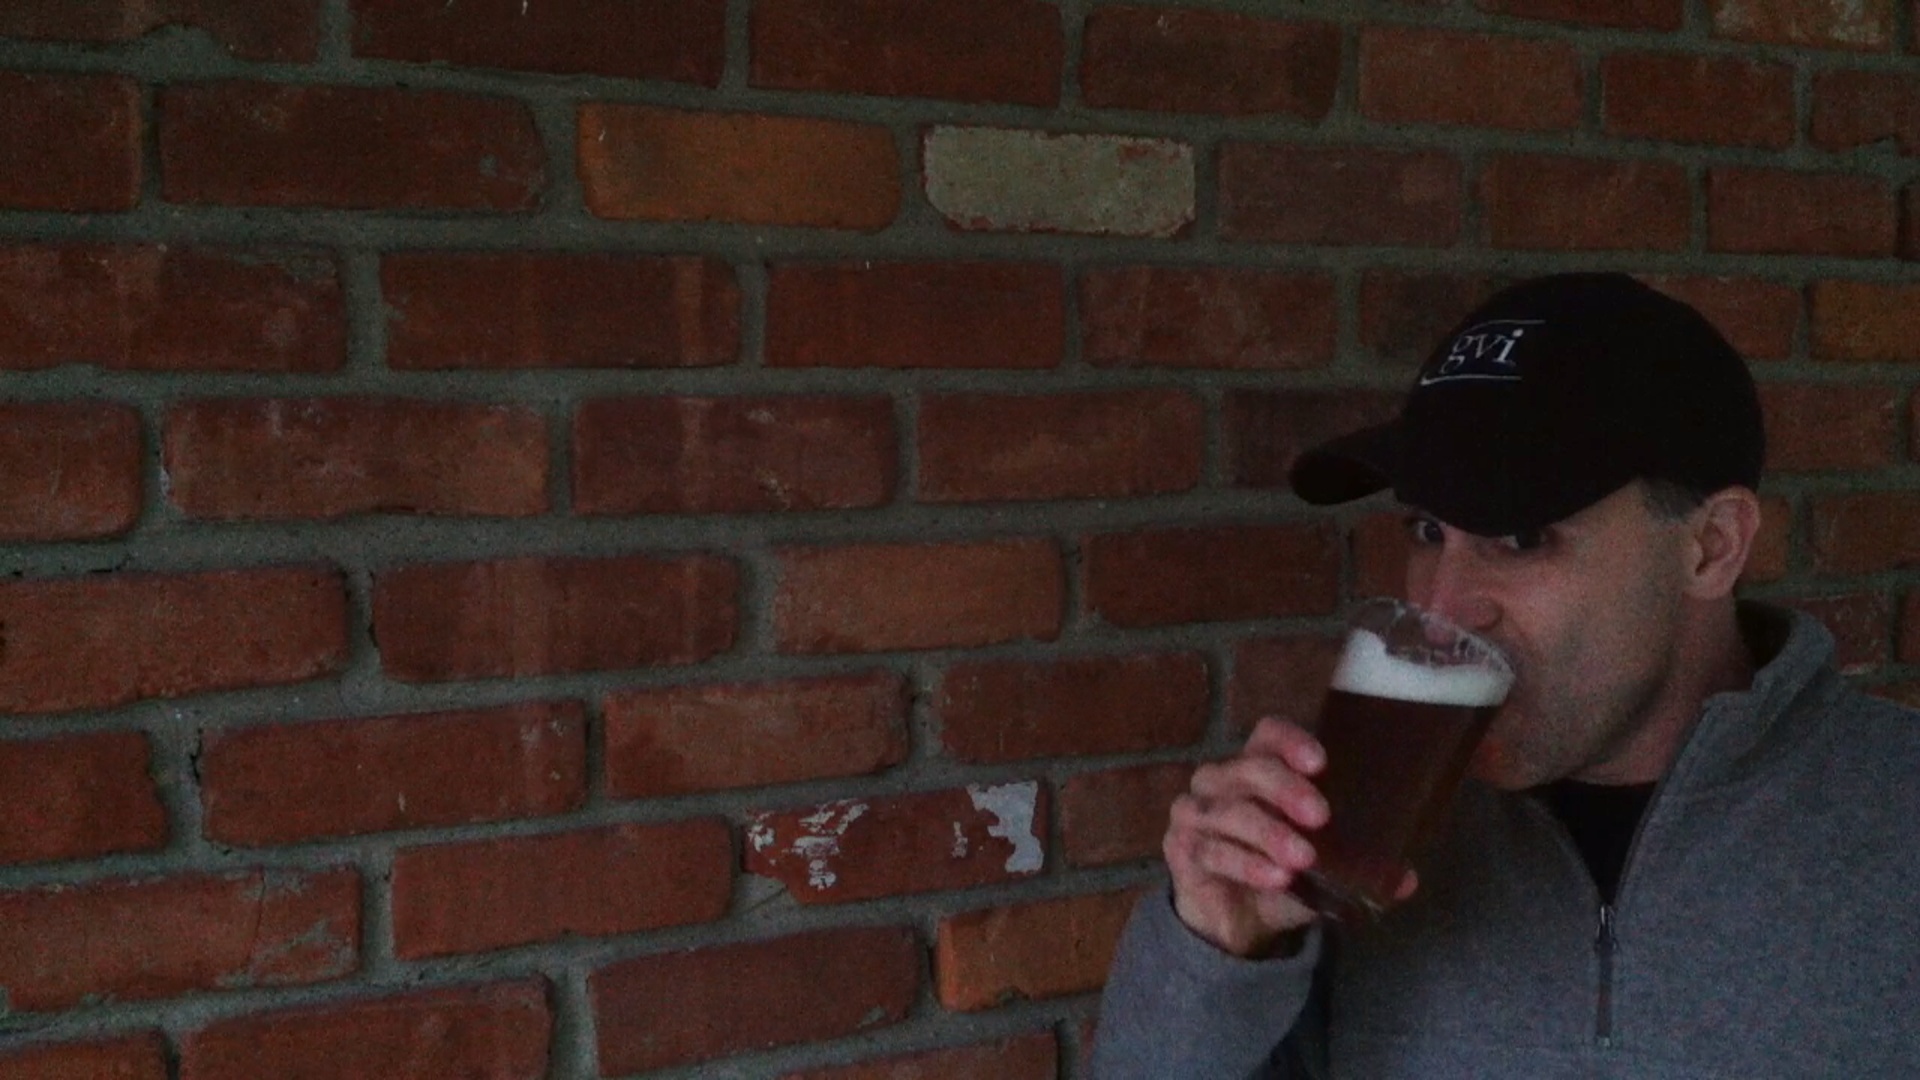
18:31 It came in at 5.25 ABV. It’s nice and clear with good aroma and good hopiness. Mine may have come out a bit grassy because the dry hops were in the secondary too long or maybe from the 1/4 oz of additional dry hops I added.
Overall it’s a good beer, and I’m happy with it. It was a tough brew for me due to all the equipment related issues I was having.