
After I upgraded my brew kettle, my last brew session took way too long, so I decided to go out and get the Banjo Cooker model KAB4. At first I was not sure which burner to purchase, so I called up support at Bayou Classic and after discussing my brew kettle size and needs they suggested this model.
It has a 30 PSI adjustable valve and weighs about 24lbs. While it will burn a lot of fuel, hopefully I can boil eight gallons of water in about 20 minutes. After my first attempt I realize just how much heat this thing can crank out! This is a solid piece of equipment.
Approximate times in the video are noted for reference.
Video Summary
After I upgraded my brew kettle, my last brew session took way too long, so I decided to go out and get the Banjo Cooker model KAB4. It’s pretty heavy; about 24lbs. I was not sure which one to get, so I called support at Bayou Classic and after discussion we decided on this on. It has a 30 PSI adjustable valve, and while it will burn a lot of fuel it should boil pretty quick; hopefully I can boil eight gallons of water in about 20 minutes. They don’t measure it in BTU’s, however he’s heard that its somewhere between 185,000-210,000 BTU’s. I’m going to put it together and use it on my next brew session.

1:37 This burner is very cool and will fit my pot really well. I noticed that the screws on the burner are a little loose. I adjusted them very carefully so as to not strip the burner. The directions are very generic; however the most important sheets there are the two loose pieces.
2:21 Attach the air shutter then take the end of the gas line and tighten it to the exposed end on the burner. Since it has a flared end I don’t need any Teflon tape. Tighten the nuts together really good, and continue to thread the hose tighter, but not too tight because you should be able to adjust the flame easily.
3:50 For the regulator it’s pretty basic; it will increase and decrease the fuel flow. The final piece to install will hold the hose up and straight.
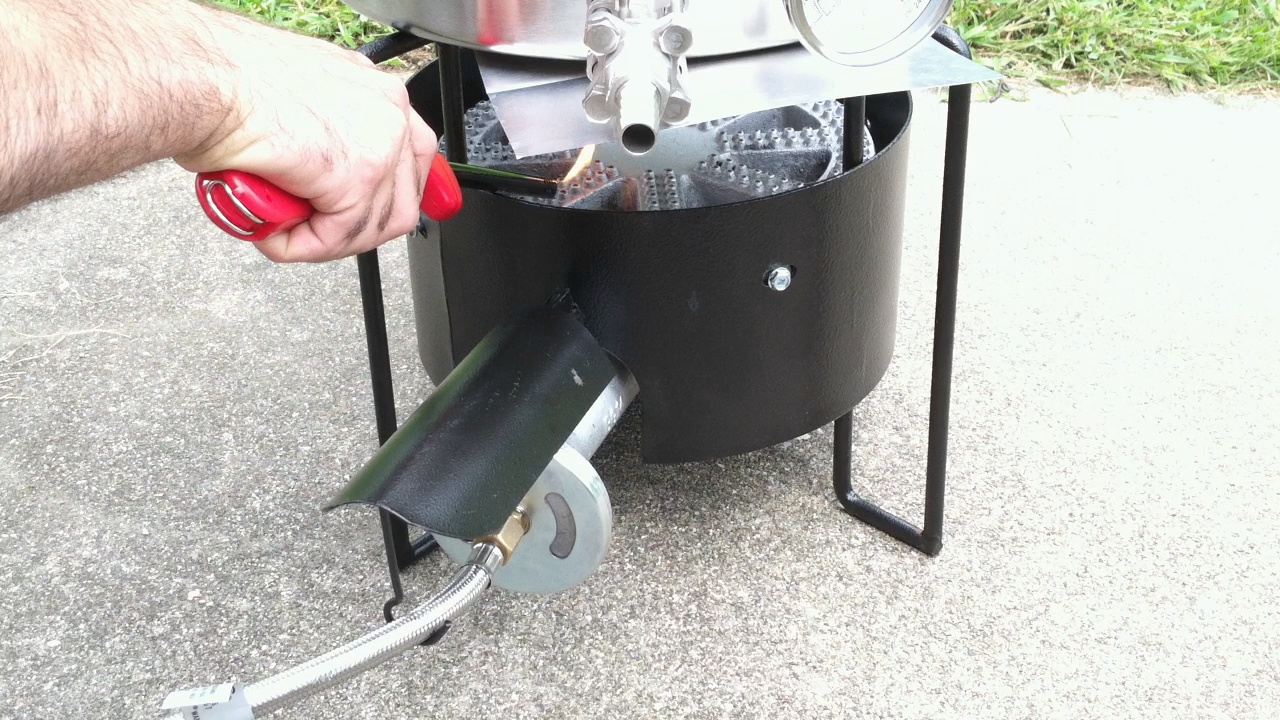
*Cautions to be aware of and appropriate preparation: Initially set air shutter to fully closed position. Make certain the regulator valve is turned clockwise to the closed position (Be sure to check the markings on your valve. Although the instructions say clockwise is closed, on mine, counter-clockwise is the closed position). Open the tank fully. Keeping face and hands away from the cooker, set lighter above the burner and open regulator a quarter of a turn. Light the burner then observe the flame.
With a proper air-gas mixture, the flame should appear blue or clear. A yellow flame indicates too much gas. Carefully turn the air control disk until the flame is blue. Then slowly open the regulator valve until the flame reaches the desired level. SLOWLY.
For a tank that is three quarters empty, the cooker may shut off. Follow instructions for relighting, remembering to only open the valve a quarter of a turn for lighting. After the cooker is lit, the most the regulator valve can be open is a quarter of a turn, therefore that’s a total of half open. A near empty tank is very sensitive, so much so that a gust of wind moving the tank could cause it to shut off the flow to the gas cooker.
Tips
- If the flame is yellow, carefully adjust the air control shutter until the flame becomes blue or clear.
- The flame blows out when the regulator valve is wide open.
- Make sure the tank is mostly full.
- Make certain the tank is level and steady.
- Gas shuts off when the regulator is turned to full open position.
- Slowly open regulator valve. Opening it too fast can activate the tank shut off safety device.
- If the cooker is operating perfectly then suddenly shuts off, it’s because it might be getting low on fuel.
- The paint will burn off the cooker and that’s normal.
First attempt using the cooker
7:33 The strike water is in the pot, ready to go and the heat shield is on. I want to make sure to adjust it to a blue or clear flame, mine is definitely orange. Once I have made it clear I will open up the regulator valve and get the water to start boiling. I have to balance the air and flame to get the correct mixture.
9:50 I had to stop the process because heat shield is torn into pieces, there is just way too much heat coming off that thing. Luckily I have two stainless steel side panels I can use. I then had to stop it once more to make another adjustment.
The panels did not seem to protect enough, so I had to adjust and pull it further forward and center the pot below the pieces. I eventually ended up stacking another piece of stainless steel on top to really ensure protection.
12:05 I don’t think I can crank the flame up full; I’ll have to be careful and adjust as necessary. It’s been about 35 minutes and I’m just hitting the strike temperature of 157.7 degrees now. It’s because I kept the temperature down by not turning-up the gas flow. I was being more cautious this first time around.