
In this video I set up my Blichmann bottle filler beer gun. I bought the basic kid that comes with the filter, beer line, and cleaning brush. I opted not to get the accessory kit; instead I picked up the rest of what I would need separately.
Once it is all put together, in order to fill put the gun all the way down a chilled bottle, then squeeze to clear the head space, tilt the bottle and squeeze the trigger quickly. Then tilt the bottle upward as you fill, let the foam flow out the top and stop quickly. After you use the CO2 button to displace the air, that’s it, cap and enjoy!
Approximate times in the video are noted for reference.
Video Summary
So about a year ago I bought this Blichmann bottle filler beer gun, and it’s just been sitting around here for a year. Never got around to using it, thought I would be doing some bottling and I have not used it yet. I had a gift card that was going to expire, which is why I bought it. So here it is, I thought I’d put it together now. The kit itself is all you’re going to get. They do make an optional accessory kit, which I thought I purchased but apparently I did not. I decided I did not need all the extra parts, since I have what I need already.
There are of course instructions, the filler itself, beer line, and a cleaning brush is all you get with the basic kit. With the accessory kit it was another 20 bucks and you get with it the other parts you’re going to need. What I did is figure out what I had laying around and I’m using what I had, and purchased a few other things I need including another gas line. So I’m going to go through all of this; I have already pre-sanitized some bottles, covered them up with foil, and stuck them in the kegerator so they get to the same temperature as the beer. We’re going to look at the instructions, get it prepped up, and bottle some beer.

1:58 This took me a little bit to figure out what I was doing here, but I think I have it figured out now. So with the beer hose you’re supposed to slide it 3/8″ in (no more than that) onto the beer gun. They say not too much so you can easily pull it off. The other end I’m going to put the fitting on the end of the hose with my stainless steel hose clamp, which will then go to your blackout connector, which will then go to the keg. On the other end I’m going to take the gas line, with my fitting and stainless steel clam (on both sides), I’m going to screw one side into the bottom of the beer gun and the other on the main gas line.
2:50 Okay, everything’s all dry and fit together and connected all correctly. Next, I’ll take it all apart and clean it with a mild detergent, I’ll be using OxiClean, and then sanitize it with Star San. So the instructions tell you to take everything completely apart, there is one piece in particular that starts the process. For this you will need to take a small flat head screwdriver and just gently give it a little twist and you can pop it right off. Don’t force it too much because you don’t want to bend it. So now it unscrews easily and the piece comes off. It appears again I’m supposed to pop the tip off with a similar process. I have to be very gentile with it. It was not too easy to get off, and a little unnerving considering how expensive it really it. First thing you want to do is protect the piece with rubber. Before you take the clip off, slide off the rubber – careful not to rip it. Then the clip you can loosen off, not easy at all. Now you can remove the inner piece so you can fill it, it’s a gentle piece with a groove (the groove weakens the piece a bit), be careful not to break any of it. Now the rest of it can be cleaned as well. I would consider this completely taken apart. The piece they give you to clean with will work for both tubes if you use both sides. At this point I’m going to clean and sanitize all my pieces.
5:47 Okay now that we have everything cleaned and sanitized let’s put this back together.
6:35 Okay, here it is all connected. I know I’m all nice and sealed up here. The tip on front is what I need to be careful with for sanitizing.
7:00 Okay so here is the plan. Since I have an extra connector for the beer out, I can disconnect that part on the kegerator and hook it up. I have my bottles in there chilling, with sanitized foil on top, they’ve all been sanitized and I just have to get them to the temperature of the keg. Now I have my gas line connected, my beer line connected, my gun is sitting in sanitizer, and I believe we have to take the serving pressure to one half, so I’m going to take a quick look at the directions to verify this.
8:16 Okay they want us to get your filling pressure to half of your dispensing pressure; start at about 5 psi. So I’ve turned off my regulators and I’m going to clear the head space on the keg. Now I will turn it on and see that we’re sitting at 5 psi. They want you to dispense at the lowest possible rate, I’m sitting at 4-5 psi – that’s good. Now I’m going to clear the beer out of the line.
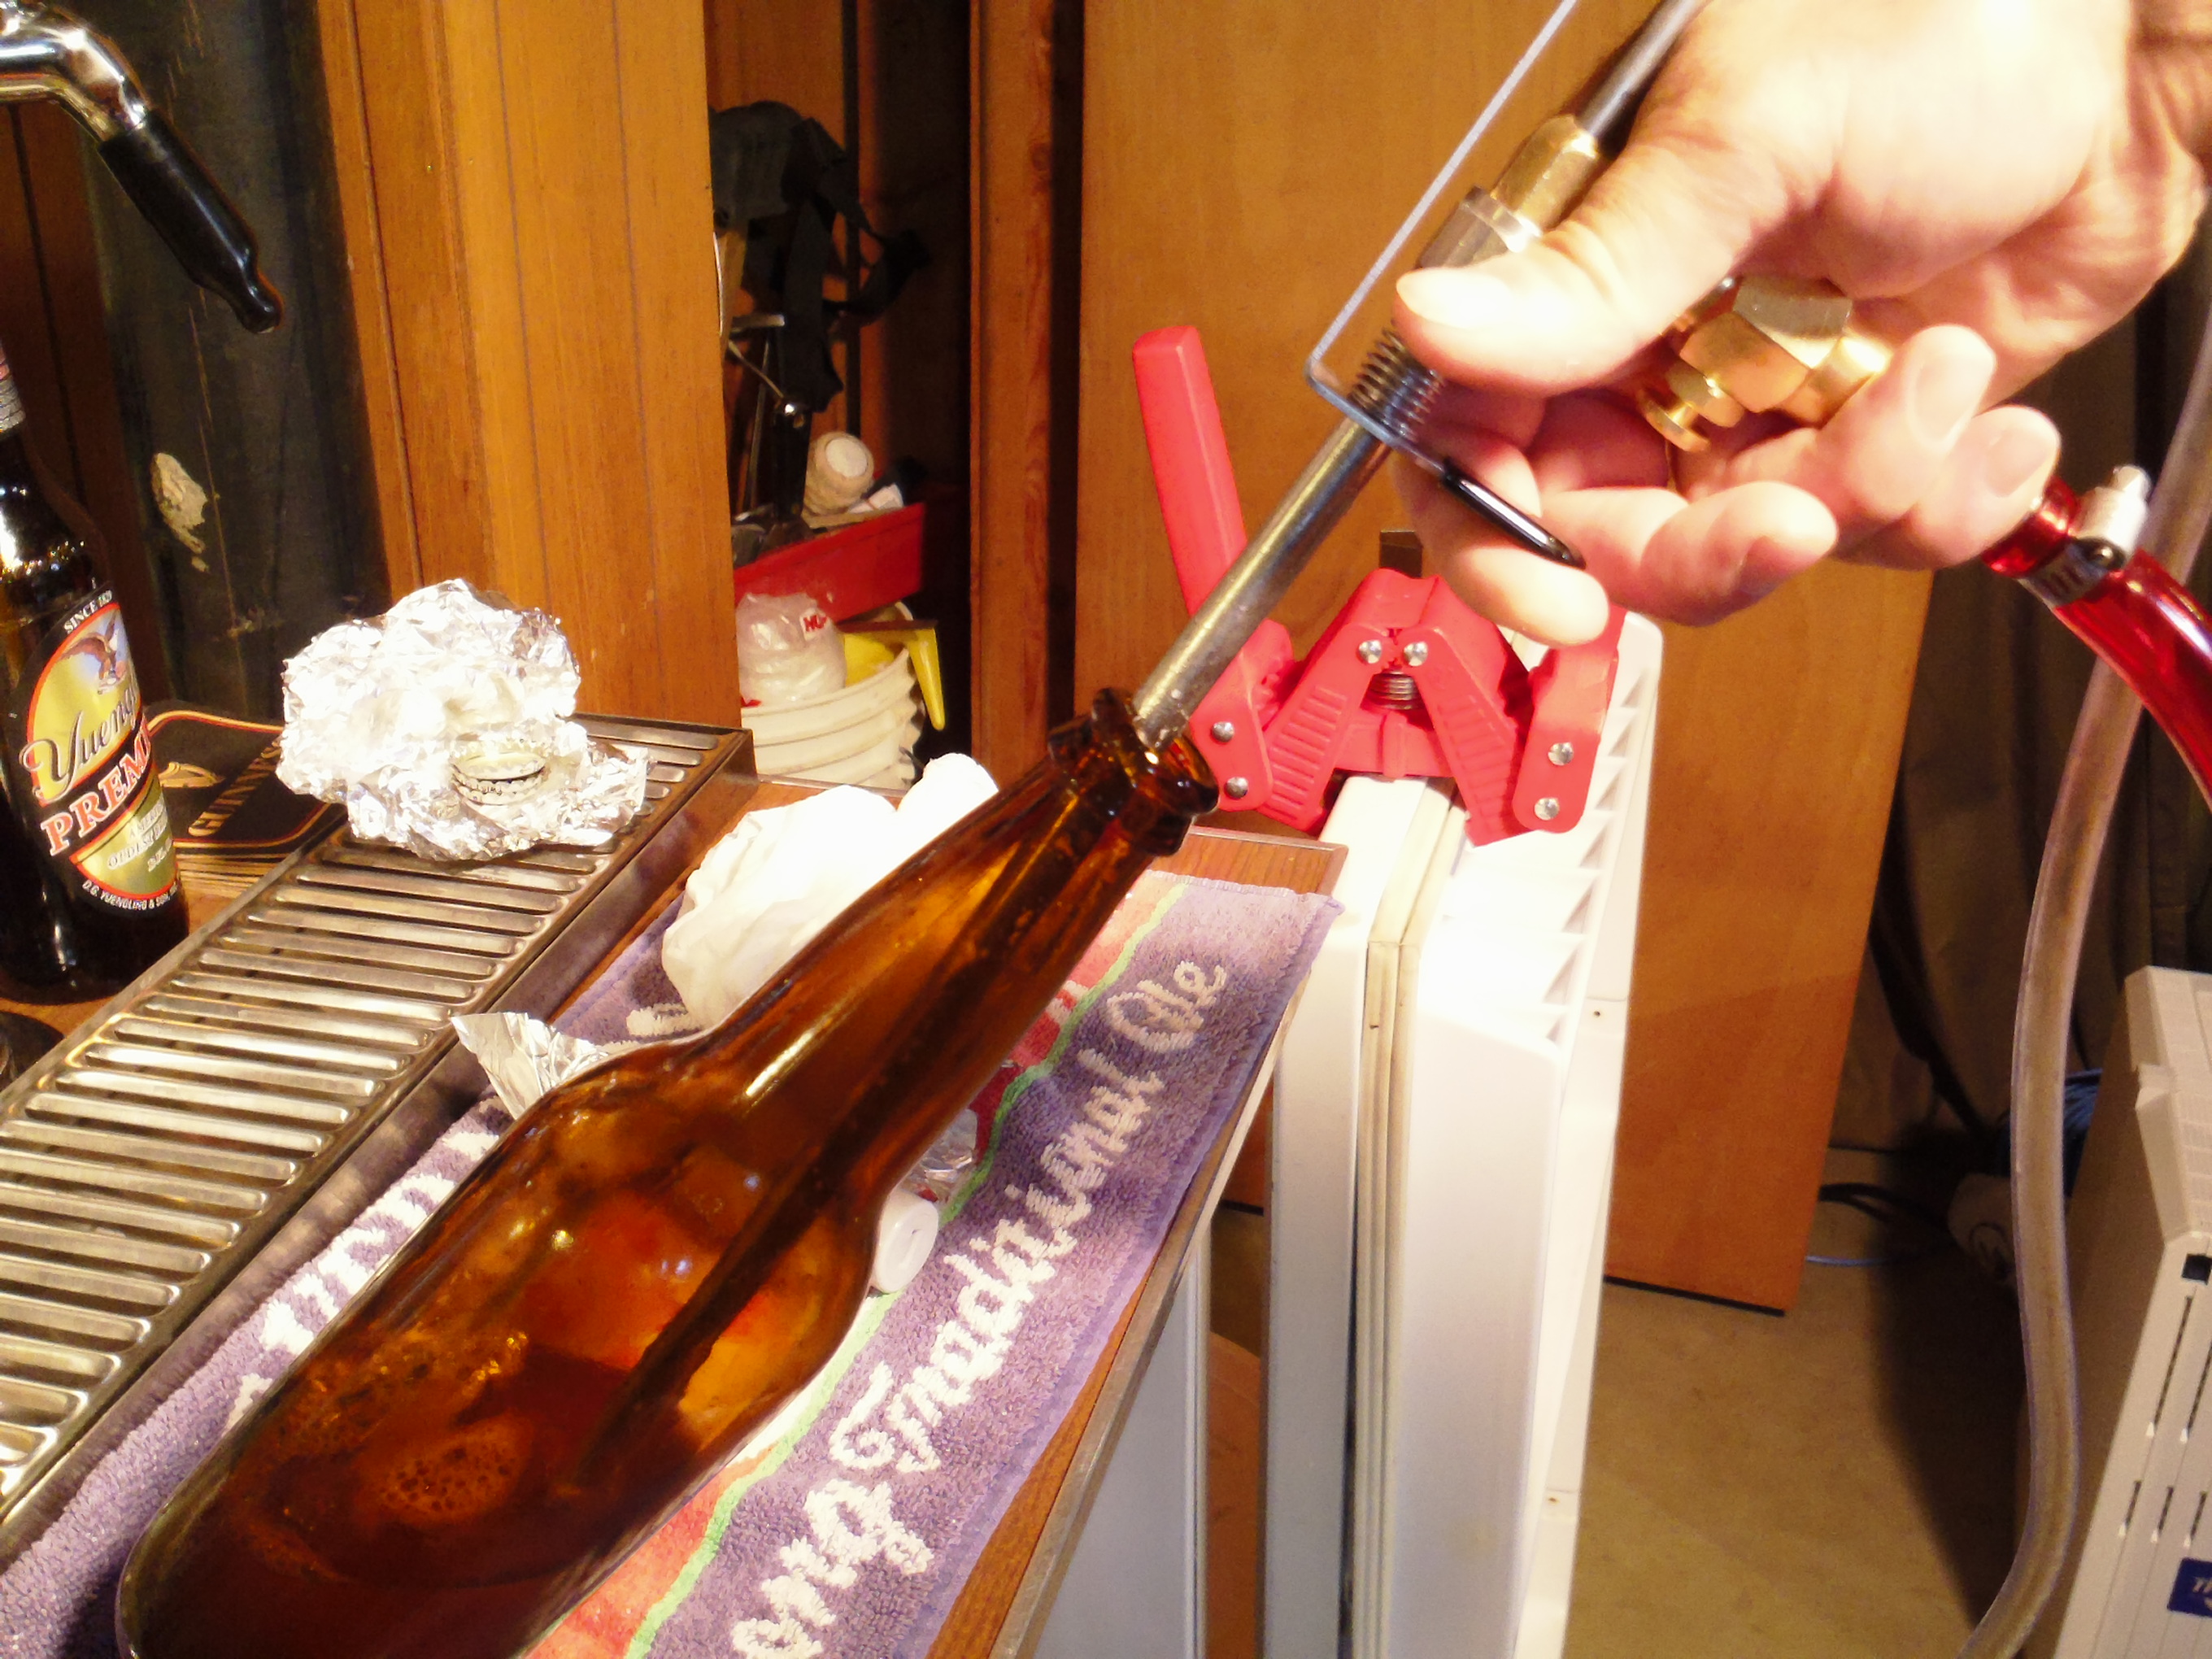
9:06 Let’s grab our first chilled bottle, I think it’s going to be a little messy, but let’s see how it goes. Bring the gun all the way down to the bottom of the bottle. Then squeeze the button 3-5 seconds. It will clear the head space and get rid of some of the air. Next, we tilt the bottle and they want you to squeeze the trigger quickly, like with a tap, you don’t want to get it in between otherwise you’re going to have a foaming issue. So squeeze it quickly, once it starts to fill, then stand the bottle up and let it continue. It should go all the way to the top, until the foam flows out of the bottle. Once it gets here, which will happen quickly, stop. Then when we lift it out, we’ll have the space there. At this point, use the CO2 button to displace the air. That’s it. Pull it out, and cap it with sanitized caps and sanitized hands. That’s it. Cool, that was easy once you get started. Let’s do another one.
11:08 Remember when we get to the top we want to pull the filler out and stop it immediately. It’s going to happen quick, once the beer gets to the top let any foam get out, stop, pull it up, clear the head space, and cap it. That’s how we do it. I’m going to do a few more and see where we go.
12:00 There you have it, the Blichmann Beer gun. Cool once I got it going and figured out how to put it all together, it worked great. It was fast, you could fill a ton of bottles really quickly. I don’t like needing to take it all apart, but I don’t think you need to pull every inch apart every time. We’ll have to see how it goes, but you’re not going to use it every day either. It does work great if you want to fill bottles.
12:34 Okay so after cleaning everything again you do have to take everything apart. There’s no way you can clean this without doing so. So I’m going to try to quickly put this back together based on what I learned. So let’s see if I can get this figured out now. The the tip is the hardest to get on and off. That it, it actually goes back pretty quickly with some practice. That’s how it works.