
I’ve calibrated my recently installed borosilicate sight glass. While there are various methods to do this, I have found one online that worked well.
Basically, I added a strip of blue painter’s tape to the sight glass, poured one gallon of water at a time into my kettle, marked with a pencil where each gallon was, then added vinyl numbers ranging from two to ten, for every gallon. I was extra careful since you have to handle the sight glass many times and I didn’t want to chip it, since mine’s actually made of glass and not plastic.
Approximate times in the video are noted for reference.
Video Summary
Supplies:
- Blue painter’s tape
- 1 gallon jar
- 11 gallons of water
- Pencil
- Vinyl numbers
- Small paper cutter
I’ve done some research online to find a way to calibrate my sight glass, and have found a method I think will work.
2:05 First I remove the sight glass from inside the protective stainless steel tubing, making sure not the chip anything. I’m going to clean it up a bit with standard rubbing alcohol to help the vinyl stick. Then I’ll take a long piece of blue tape (without going all the way down or up) putting one solid piece along the length of the glass. It’s difficult to make it perfect and straight, so I did the best I could.
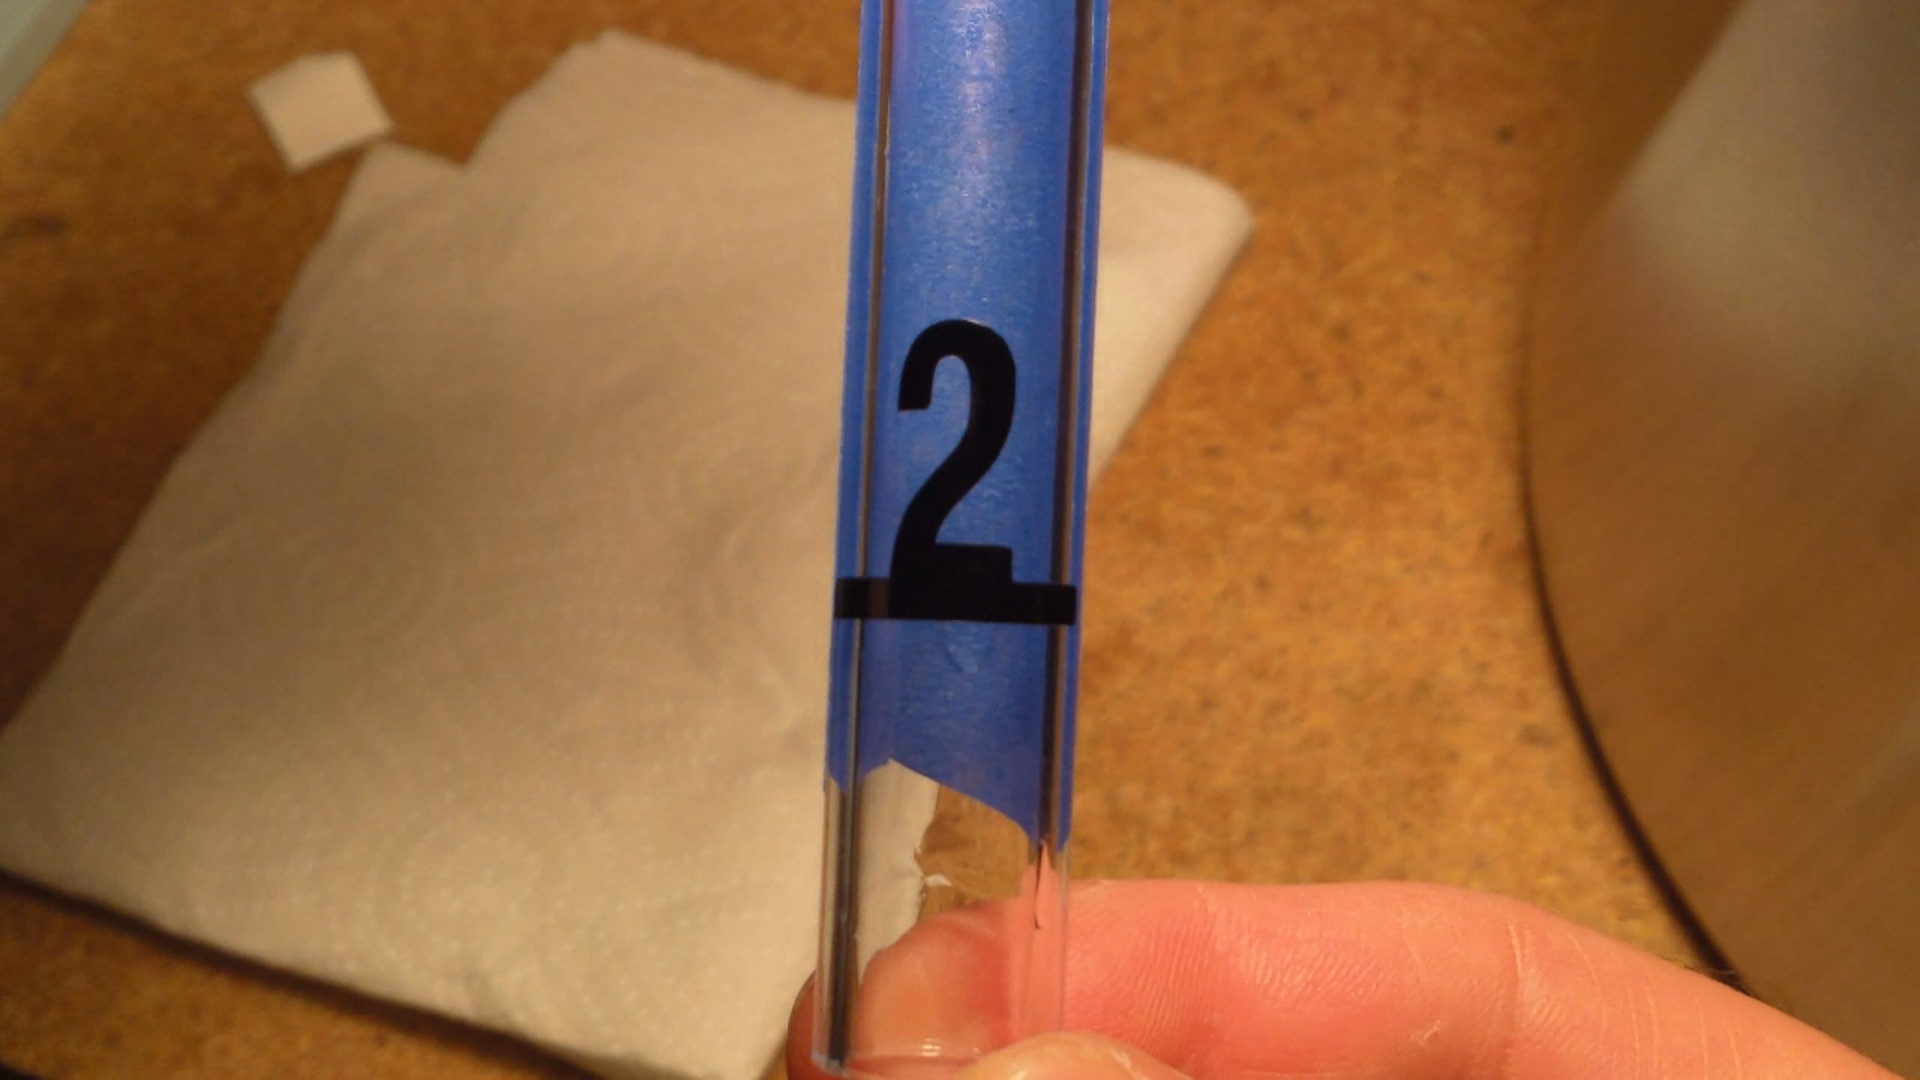
3:50 My pot is always level, using a few shims. I’m going to start pouring some water into the pot now. As I pour each gallon, I mark on the tape where the level is – two through ten. Now I will drain all the water and start putting on the numbers.
5:40 Unfortunately the edges of the numbers are not cut perfectly, which will make my cuts more difficult. I will do my best with the paper cutter and if that fails I will have to do it by hand. I’m going to pick one size for the numbers and try to keep everything equal.
6:56 After I cut all the numbers, I start with number two and peel the back off, which proves to be its own challenge. I have one shot to put the number on correctly, and it’s difficult to see if I’m in the correct spot and to keep the number straight. Once I’m satisfied with the positioning, I make sure the number is stuck good, and slowly begin to peel the rest of the paper off. I continue the process for the rest of the numbers, cleaning the glass as I go, so the numbers stick properly. The process definitely get’s easier as you go.
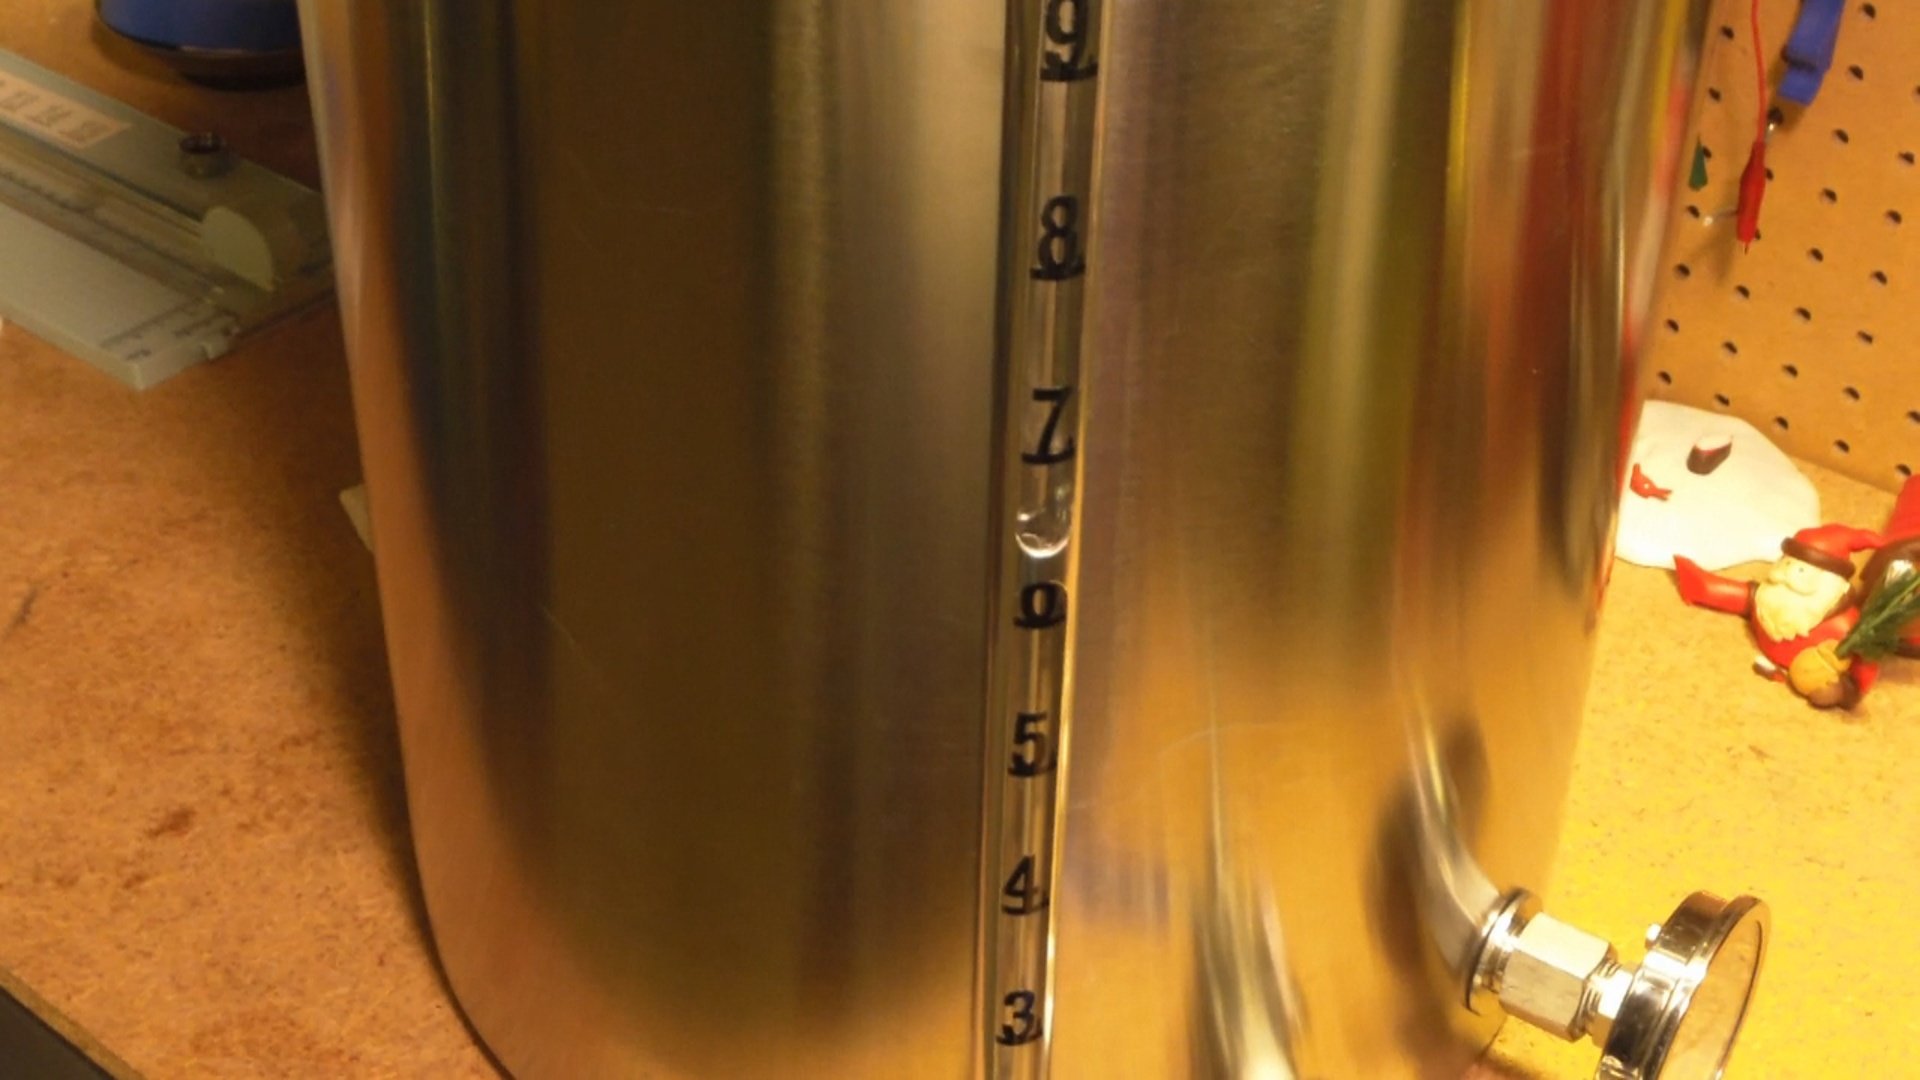
10:19 The numbers are complete. Now I slowly slide the glass back in, put the tubing cap on, and my calibration is complete.